iOS开发使用xib创建自定义UITableViewCell
iOS应用开发中使用最多的控件莫过于就是UITableView了,而用于显示UITableView行的就是UITableViewCell.
UITableViewCell类默认有
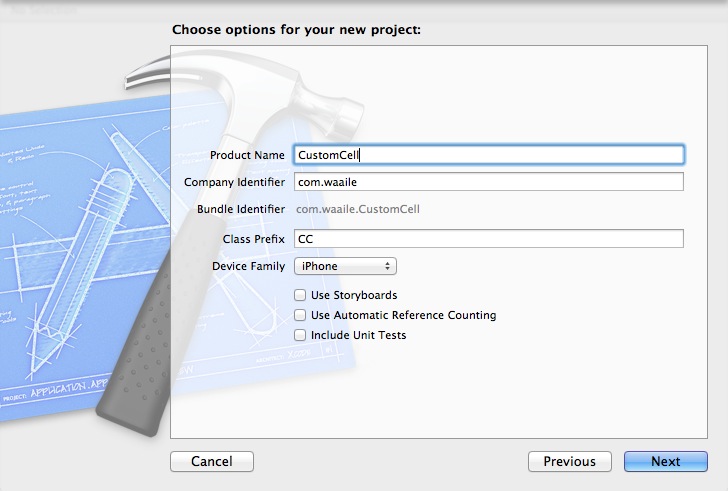
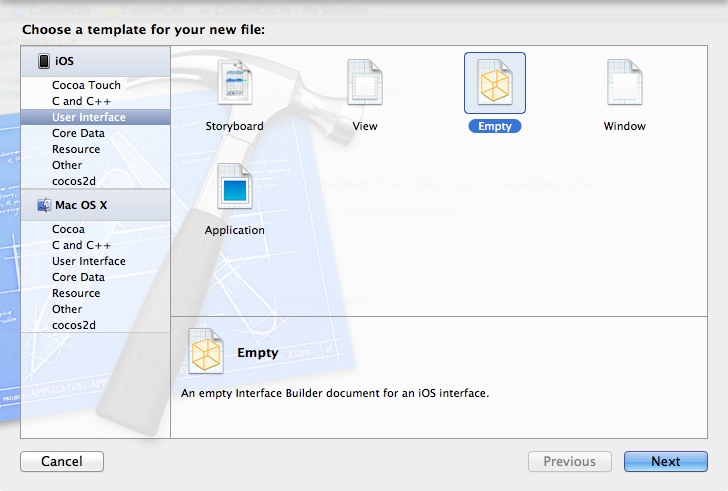
1.创建一个新项目,选择SingleView模版.Product Name 输入 CustomCell ,Device Family 选择 iphone.
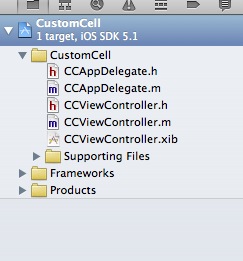
2.创建完毕后可见目录结构如下
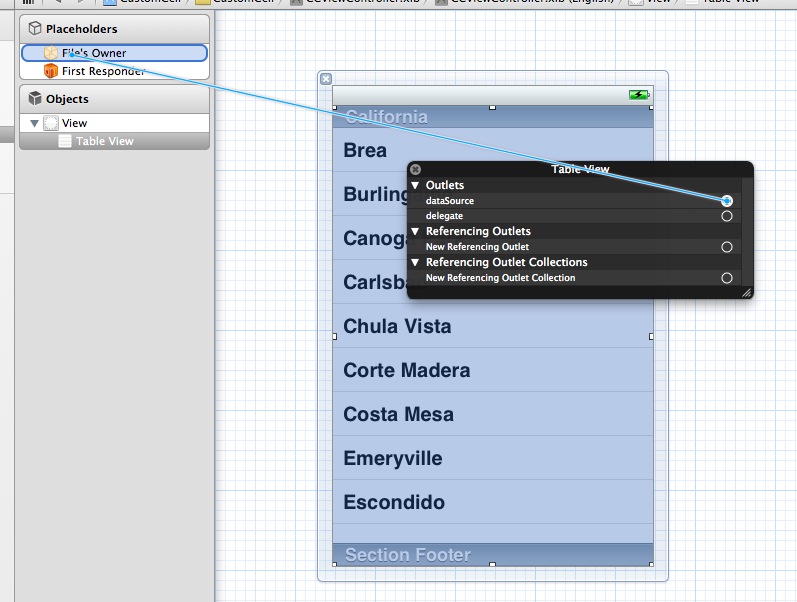
3.打开CCViewController.xib,拖一个UITableView在view上,右击UITableView,分别dataSource和delegate链接到File’s Owner处.这里的FIle’s Owner就是CCViewController.
4.在CCViewControlller.m上添加以下代码
#import "CCViewController.h"

@interface CCViewController () <UITableViewDataSource,UITableViewDelegate>

@end

@implementation CCViewController

- (void)viewDidLoad
{
	[super viewDidLoad];
	// Do any additional setup after loading the view, typically from a nib.
}

- (void)viewDidUnload
{
	[super viewDidUnload];
	// Release any retained subviews of the main view.
}

- (BOOL)shouldAutorotateToInterfaceOrientation:(UIInterfaceOrientation)interfaceOrientation
{
	return (interfaceOrientation != UIInterfaceOrientationPortraitUpsideDown);
}

#pragma mark -
#pragma mark Implements UITableViewDelegate Methods

//cell的高度
- (CGFloat)tableView:(UITableView *)tableView heightForRowAtIndexPath:(NSIndexPath *)indexPath
{
	return 100;
}

//header的高度,这里不需要显示header,直接返回0
- (CGFloat)tableView:(UITableView *)tableView heightForHeaderInSection:(NSInteger)section
{
	return 0;
}

//footer的高度,这里不需要显示footer,直接返回0
- (CGFloat)tableView:(UITableView *)tableView heightForFooterInSection:(NSInteger)section
{
	return 0;
}

//响应cell的选中事件
- (void)tableView:(UITableView *)tableView didSelectRowAtIndexPath:(NSIndexPath *)indexPath
{

}

#pragma mark -
#pragma mark Implements UITableViewDataSource Methods

//cell的数目,这里假设是3个
- (NSInteger)tableView:(UITableView *)tableView numberOfRowsInSection:(NSInteger)section
{
	return 3;
}

//返回cell
- (UITableViewCell *)tableView:(UITableView *)tableView cellForRowAtIndexPath:(NSIndexPath *)indexPath
{
	//TODO:在这里载入自定义cell
}
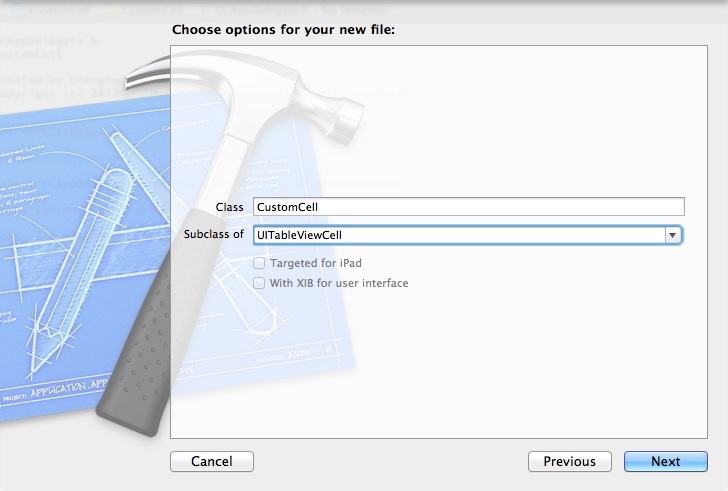
@end- 新建CustomCell类,继承UITableViewCell.
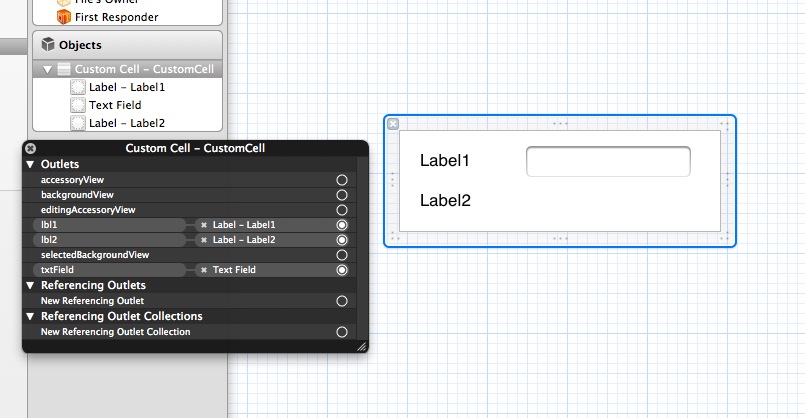
6.新建xib,在新建模版中选择User Interface的empty模版.Device Family选择iphone,保存为CustomCell.xib
7.在CustomCell.xib里拖放一个UITableViewCell,设置UITableViewCell的高度为100,class改为CustomCell,Identifier为CustomCell.Identifier是可重用标识,待会会用到的.再在CustomCell(即刚刚拖进去的UITableViewCell)上拖进两个UILabel和一个UITextField(如下图).然后分别将这几个控件绑定到CustomCell去.
8.接下来回到CCViewControlller.m里,引入头文件CustomCell.h,然后修改返回cell的函数如下
//返回cell
- (UITableViewCell *)tableView:(UITableView *)tableView cellForRowAtIndexPath:(NSIndexPath *)indexPath
{
CustomCell *cell;
//定义CustomCell的复用标识,这个就是刚才在CustomCell.xib中设置的那个Identifier,一定要相同,否则无法复用
static NSString *identifier = @"CustomCell";
//根据复用标识查找TableView里是否有可复用的cell,有则返回给cell
cell = (CustomCell*)[tableView dequeueReusableCellWithIdentifier:identifier];
//判断是否获取到复用cell,没有则从xib中初始化一个cell
if (!cell) {
//将Custom.xib中的所有对象载入
NSArray *nib = [[NSBundle mainBundle] loadNibNamed:@"CustomCell" owner:nil options:nil];
//第一个对象就是CustomCell了
cell = [nib objectAtIndex:0];
}
NSString *str = [NSString stringWithFormat:@"%i",indexPath.row];
//修改CustomCell的控件
cell.lbl1.text = str;
cell.lbl2.text = str;
cell.txtField.text = str;
//返回CustomCell
return cell;
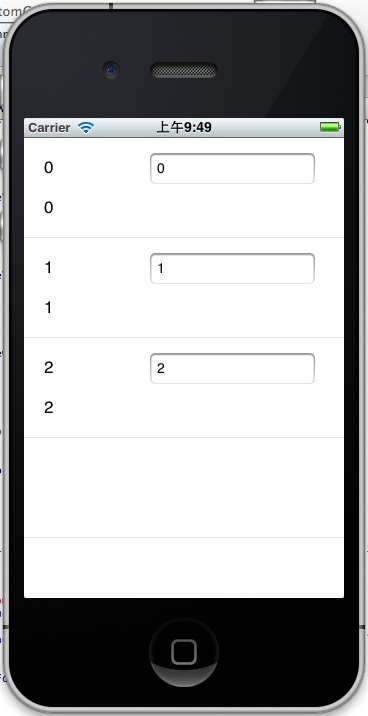
}9.最后效果图
PS:尊重他人劳动成功,转载请保留本站地址 http://blog.waaile.com,谢谢!
本教程的源码下载地址

《iOS开发使用xib创建自定义UITableViewCell》 由 Shingwa Six 创作,采用 知识共享署名-非商业性使用-相同方式共享 4.0 国际许可协议进行许可。